Tuesday, November 18, 2014

BBQ Jerk Turkey Breast with Root Beer Apples


I know it's not nice to call someone a jerk, but when your talking about the powerhouse of spicy and sweet flavors then it's really okay! This combo of jerk seasoning and root beer apples is from one of the first trips I took to Disneyland with the hubs. We had this perfectly seared and roasted spicy pork loin that was served with a mountain of mashed potatoes and slow simmered apples. What was crazy was had an additional flavor of root beer which sounds odd, but pairs perfectly with the spice. We have made our own version at home for years with pork, but I thought hey why not try it on a boneless turkey breast.

It's a really easy recipe but sometime easy is a good thing! Give it a try and let me know what you think.

ingredients

Jerk seasoning blend ( I use this one and its nice and spicy )
Olive oil

Root beer apples

5 Fuji apples
1 tsp. cinnamon
1/4 tsp. freshly grated nutmeg
1/4 tsp. salt
1/8 tsp. black pepper
2 Tablespoons melted unsalted butter
1cup of root beer


Rub turkey breast with jerk seasoning. Refrigerate for at least an hour.


While that's chillin' in the fridge prep your apples. Preheat oven to 400. Peel and core your Fuji apples. Cut into thick wedges about 6 per apple. I used gigantic Fuji apples so I only needed 2. They cook down and shrink so keep them on the larger side. 


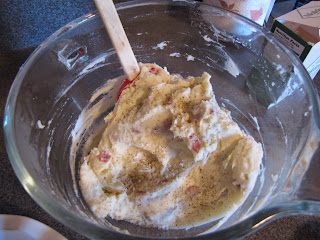
In a large bowl combine melted butter, cinnamon, nutmeg, and a pinch of salt. Toss apples in butter mix and lay in a baking dish. Cover with root beer and then tightly fitted aluminum foil. Bake for 20 mins. Uncover and continue to cook for 20 more. Check to make sure they are just tender and turn oven off and return pan back inside. This give them a chance to stay warm while you BBQ your turkey and absorb more of that buttery spicy root beer flavor.


You can use gas or charcoal for your grilling source. Get it nice and hot and make sure you have your meat thermometer handy, your going to need it. 


Brush the grates with olive oil and lay the turkey breast across the grates in a diagonal. Cook for about 5 minutes then turn breast over on the opposite diagonal for 5 more minutes. Now turn back on first side but across your grill marks, this will give you that cross hatch perfect grill marks. Repeat on second side and check temperate should be 165°. No less than 165°!! Poultry is never served medium rare only well done. This is why you need a meat thermometer.


Once cooked through. Remove from grill an cover with foil. Let it rest for 5-10 mins so juices can redistribute and then slice on the diagonal. Fan it out on your plates on top of apples and root beer sauce. You can serve these with a side of mashed potatoes or better yet bright orange mashed sweet potatoes. Can you say YUM!!

Happy Cooking!

Thursday, November 13, 2014

Buttery Red Skinned Mashed Potatoes


One of my favorite memories from culinary school was during the first 6 weeks. We had to take skills labs at 7am every morning. We learned proper cuts, mother sauces, reductions, how to cook meats properly, just to name a few. My favorite thing we learned was how to make the perfect mashed potatoes, we even had these for breakfast... I mean you have to taste so you know if they are right. Pair them with a perfectly medium rare NY strip steak and compound butter and game over!


OK- back to this recipe. It is an adaptation of those skills I learned and lent themselves to be open to additional flavors. Toady we are using red skinned potatoes but this recipe works with Yukon golds, baking potatoes and even purple potatoes. The trick with leaving the skins on is to make sure you scrub them really well with cold water prior to boiling.

Ingredients

3 pound potatoes of your choice
Large pot 
Cold water
4 T unsalted butter
1/4 cup of Heavy cream / half and half ( even fat free half and half works great)
Finishing salt or kosher salt
Fresh cracked back pepper

Optional add in Ideas
2 T. Cream cheese any flavor
1/4 cup shredded cheese
Chives or herbs of your choice
Crumbled soft cheese, such as goat or blue
Caramelized onions


Scrub your potatoes in cold water. Cut into 1 inch chunks and place in a large pot. Cover potatoes with cold water and have a lid handy. Bring potatoes up to a rolling boil, and cook your potatoes until you can easily inset and remove a sharp knife into the largest pieces.


Drain potatoes and transfer them to your stand mixer, or back in pan if your using a hand mixer. Slowly whisk potatoes till they just start to break apart. Add in cream and butter and whip at medium speed until only small lumps remain. Do not over mix, or they will go from fluffy and luscious to paste really quick. I'm pretty sure they frown upon eating paste, even in kindergarten now.


 Sprinkle in a palmful of salt and about a teaspoon of pepper into it. Using a spatula, fold together, and now the best part... Give em' a taste. 


If they seem sweet, add more salt. If they taste bland, more butter. Once they are perfect transfer them to your oven safe serving dish and top with a pat of butter and a light sprinkling of salt and pepper. Let the butter pool over the top and they are ready to outshine anything you serve them with. 

Happy Cooking!

Tuesday, November 11, 2014

Maple Bourbon Turkey Breast


It just so happens I actually enjoy turkey more than just once a year... Anyone else? Well turkey breast are really available at your local grocery store and lucky for you they are usually fresh and thawed so you can make this recipe without days of preparation. I like to serve it with buttery red skinned mashed potatoes. The rich maple Bourbon glaze during the last hour of cooking pairs perfectly with the sage and orange notes in its herbed butter.

If you did not read my post on turkey basics, you may want to click here first, then this recipe will be a lot easier to follow. This can also be used for your whole bird on Turkey- Day as well. So let's get rolling and get your birdie all drunk and sweet.

Ingredients

5-7 pound turkey breast
1 orange zested and cut in half 
1 yellow onion cut into quarters
2 sprigs of fresh sage, 4 leaves chopped the rest left on the stem
4 Tablespoons unsalted butter
Coarse salt
Black pepper
4 Tablespoons maple syrup ( the real deal)
2 Tablespoons good ol' Kentucky bourbon


Preheat your oven to 425 degrees. 

First rinse your turkey with cold water inside and out, pat dry with paper towels. Place into a roasting pan with high sides- you want to save any juices that roast off your turkey. Fill cavity with onions, orange haves, sage sprigs, and liberal amounts of salt and pepper


In a small bowl, combine butter, chopped sage, orange zest, salt and pepper. We are going to use half of this to rub under the skin on the breast, the other half you want to massage all over the outside skin of the turkey. Rub it in well so it's a even coverage. Sprinkle outside skin with salt and pepper, this will make that golden brown skin.


Place your turkey in the preheated oven at 450 for 45mins. Then drop the temperature down to 350 and continue to cook for an hour. Combine bourbon and syrup together and brush over skin of turkey breast and roast until internal temperature of thickest part of breast reaches 165°. If you have a lot of juices and you need something to do you can baste, but it is not necessary.


Take your turkey out of oven and tent with foil and let it rest for 15 mins. This will give the juices a chance to redistribute. Serve with your favorite sides.

Happy Cooking!


Thursday, November 6, 2014

Green Bean Casserole! here we go, here we go, here we go!

About 5 years ago we hosted our first Thanksgiving in our new home. We had the whole family here as well as our brothers from other mothers. A huge debate imploded upon my desire to make a "chefed up" take on the classic green bean casserole. Well, my sweet hubby felt very strongly against the change. Unfortunately for me his bro-backers all agreed that it had to be the classic version. I protested (because let's be honest I do that a lot when it comes to menu changes at the last second) and told them fine they were in charge of making it. 

They took it to a whole new level and the birth of the annual green bean casserole song and dance happened right in my kitchen. Lucky for me I caught it on tape, and now lucky for you.. I'm airing this hot mess for everyone! A few disclaimers: No they had not started drinking yet, and yes they act like this every time I try and take pictures. I have no idea why my child has no pants on either. It still makes me smile to this day. They are just lucky I love them! 


You can find the classic recipe on any can of french fried onions... Or you can make my version that will in my humble opinion, blow your mind! Here is the step by step for a new spin on an old favorite. Don't worry you can still sing the song while you make it.


Ingredients

1 pound haricot vert (fancy thin green beans)
8 oz. shiitake mushrooms, stems removed and thinly sliced
1 cup half and half
1 T. Butter, divided
1 T. AP flour
2 sprigs fresh thyme, chopped
2 T. Grated Parmesan cheese
Fresh cracked black pepper
Sea salt

Onion topping


1 large yellow onion, thinly sliced
1 T. Butter
1 clove garlic, minced
2 sprigs fresh thyme, chopped
1 T. Olive oil
1/2 Cup pinko bread crumbs


Start with the mushroom bechamel sauce. melt half your butter in a sauce pan until it begins to foam. 


Add in sliced mushrooms and cook until they it's begin to brown. 


Add the second half of your butter and melt, coating all the shrooms'. 

Then Sprinkle flour over mushrooms and stir for about a minuet. You have to cook it for two reasons, one to get rid of the raw flour taste and two to create a roux (fat and flour paste) that will thicken our half and half.  

 
Slowly add in half and half, whisking to avoid lumps in your cream sauce.

 Sprinkle in chopped thyme and slowly bring to a low boil, you should feel it fighting up and getting all creamy and GOOD! 

Now sprinkle in your Parmesan, stir until melted. Season to taste with salt and pepper. Turn off the heat and proceed with the green beans.

In a large bowl place your green beans. I personally always buy the Trader Joes frozen haricot vert , they are the best during a time of year when fresh are not available. They are also the best bang for your buck!  Pour that luscious mushroom cream sauce right over the top and toss them together. smooth into a casserole pan. 


Now Preheat your oven to 350. Let's get cracking on that crunchy topping that will be so much better than its canned counterpart. 


Melt your butter in a small saucepan. We are going to sauté our onions until they just start to get caramelized . They will be sweet, buttery and delicious. 

Once they are golden brown add in the olive oil, minced garlic and thyme. Cook just until you can smell it. Garlic has a high sugar content so it burns very quickly, so don't over cook it, burnt garlic will ruin any dish. 

Add the panko until the oil is absorbed by the bread crumbs and it just starts to toast a little. Season with salt and pepper.

Spread evenly over top of green beans. This topping is also an amazing way to church up a boring weeknight tuna noodle casserole!


Bake In a toasty 350 oven for 30 mins. 

The casserole will be warm and bubbly, but the beans will still have the perfect fresh snap to them.


If your guest don't love this take on a old dish, well... just find new friends.

Happy cooking!

Monday, November 3, 2014

The Power of Herbs


Have you every been in the middle of making your dinner and reach for a beautiful bunch of fresh parsley only to stop in horror and realize you forgot to go back and get it in the store? Me too! (All the time) I keep a small little herb garden on my patio but usually I use way more than I grow, so I always have a backup stash of dried herbs to fall back on. When to use Fresh Herbs vs. Dried Herbs is a great skill to know and will help you elevate the flavor in your meals.

Lets start with the Fresh:

Fresh herbs are wonderful to grow and require only minimal tending to. We had our first freeze last night so my last bit of basil is no more. Parsley is still green and happy, so we will see how long that lasts. Fresh herbs can totally transform a dish, and just like salt it can also enhance the flavor. You should use them mostly at the post heat portion or last bit of cooking time for your dishes to get the maximum flavor punch as well as brightness of color and contrasting texture. Bright green herbs add a 'wow' factor that just do not come in a jar.

With any rules there are always loop holes, and in my world I always try and find a loop hole.  I love love love to use fresh hearty herbs like thyme or rosemary when I'm roasting veggies or any lucky beast of a meat! They lend themselves to big flavor and hold up in high heat and long cooking times much better than say cilantro or basil would. 


On to the Dry goods:

Repeat after me... I will not be a hoarder of spices and herbs! Keep in mind they do have a shelf life and they do lose their magical ability to season your food. Old herbs can work against you and make your meal taste like it has wood shavings in it. It can be gritty and bitter and not so yummy. Don't be cheap! Date your spices with the month and year you brought them home from the store, or follow the use by date printed on them. If you don't have a date printed just follow this simple timeline for your spice cupboard.

Ground Spices: 6-12 months
Whole Spices: 1-3 years
Green Leafy Herbs: 1-3 years
Seeds: 3-4 years


Dried herbs are meant to be re hydrated. Most recipes you will come across have you adding them in the beginning of the cooking process, so they can gradually add flavors, and bloom over time.  

Don't be fooled by pre-made seasoning packages because you can just as easily find a way to use up spices by making your own taco or chili seasonings at home with a quick Google of recipes. They will taste better for two reasons: 1) you know the freshness of ingredients, and 2) you are in control of what you like more of and what you want to keep out, like sodium or starches. 

Now you've got the skinny on the herbage so add them in, mix it up and elevate your dinner game! 

Happy Cooking, Friends!

Let's talk Turkey!

Tired of the same old dry, sad and bland bird year after year? Too overwhelmed with a brand-new recipe you saw Martha make? Well here is your answer! Every Tuesday between now and Thanksgiving I'm going to give you tips to steer you clear of the same old turkey. We want to have a camera ready creation that makes your family and friends pass the side dishes for a second helping of your beautiful tasty bird.


 A boy and his first Thanksgiving turkey. It was love at first sight!


Let's talk bird basics first. You can get an organic bird, you can get a free range bird, you can even get a bird that's been wined, dinned and made breakfast the next morning! I really have no preference, the point is get a turkey and proceed to step one.

Step one: Make sure you take the giblets out. This is a running joke in my family that my father did almost 35 years ago one Thanksgiving- He left them in and has yet to hear the end of it. My husband deep-fried a bird with them a couple years ago still my dad did not catch a break on this reminder. Just take them out folks! It's not worth the ridicule.

Step two: When you unwrap the turkey there is a smell. It is a funky smell. It's not a smell that you really want to smell for a long period of time  So rinse your bird inside out with cold water. This is also a good time to make sure it's not frozen. Dry it well with paper towels

Step three: We want to pack this bird full of aromatic goodness. Now you can make your stuffing, dressing or whatever you want to call it in a separate pan. Nobody wants stuffing that came out of of birds ass- trust me. Trying to get the fluffy stuff fully cooked is like playing Russian Roulette. The bird will be over cooked and a wicked case of food poisoning can come from salmonella laced undercooked stuffing. You can add turkey drippings or whatever you need later, but keep it separate. You really do want to keep the cavity of the bird for all your good aromatics we're going to put in- root veggies, citrus and big old hand fulls of the fresh powerhouse herbs in the upcoming recipes.

Step Four: Lather it up and rub it down! Take butter (good unsalted butter) because we want to add in our own flavors. We don't want salt that has been sitting on the shelf either, we want fresh salt.  I like to use Maldon salt because of it's nice crunchy finishing effect, but kosher salt works well too. Mix softened butter, about a stick. I know it seems like a lot... But there's a lot of bird to cover. I mix in citrus zest , the salt, some fresh cracked pepper, and if you want a little heat you can add a dash or two of cayenne pepper to it, then mix that together until it's nice and smooth.

 Lift up the skin carefully with your fingers and massage half the butter underneath the skin of the bird. You want to make sure you get the legs, the breasts, the back, the thighs and all of it. Take the other half of the butter and message it all over the outside skin of the bird. Now add a nice liberal sprinkling of salt and fresh cracked pepper on the outside ready to go in a nice hot oven.

Step Five: Roasting to golden goodness! I like a big burst of heat to brown my turkey, 400 degrees for about 30 mins. Then drop oven down to 350 degrees for 2 more hours. Watch out for the skin. If its looking like it's burning, tent with foil. Cook that baby until a meat thermometer registers 165°. No one should request medium rare turkey or chicken! This is not negotiable. Check both the breast temp and thickest leg for 165°. Remove your glorious turkey and cover with foil for 20 mins to let the juices redistribute. If you cut it too early they will end up all over the board and your bird will be dry. Slice and serve. 


Remember these are just the outside lines of a tasty turkey. In the coming weeks I will be give you some flavoring ideas to color the rest in and make the turkey of your dreams! There may even be a special Thanksgiving gadget giveaway so stay tuned!